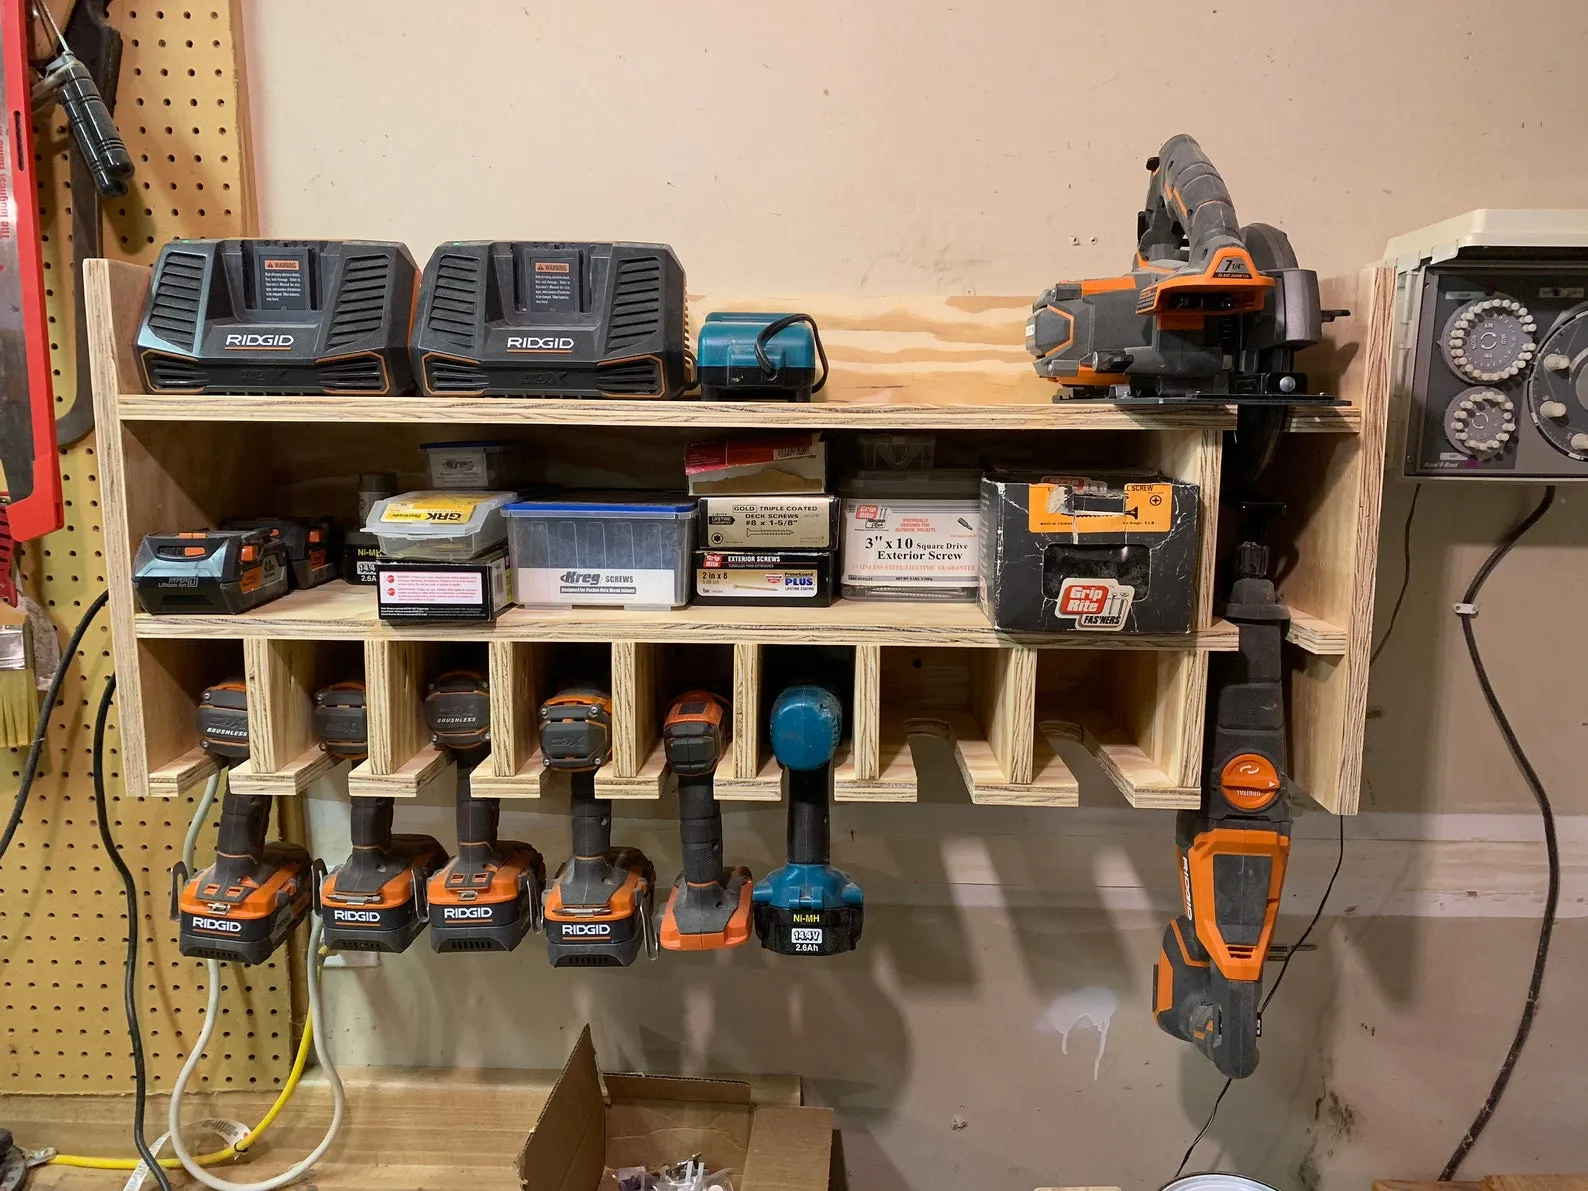
DIY Tool Organizer: A Simple Guide to Keeping Your Workspace Neat
A well-organized tool storage system can make a huge difference in any garage, workshop, or home repair space. Instead of spending money on expensive organizers, why not build your own DIY tool organizer that fits your specific needs?
This guide will help you create a functional, customizable, and budget-friendly tool organizer that keeps everything in its place!
🛠️ Why Build Your Own Tool Organizer?
✔ Customized Storage – Organize tools based on your needs and workspace.
✔ Saves Time – No more wasting time searching for the right tool.
✔ Budget-Friendly – Uses materials you may already have.
✔ Keeps Tools in Good Condition – Protects tools from damage.
✔ Satisfying DIY Project – A great way to improve your workspace while practicing your skills!
📏 Step 1: Choose Your Organizer Type
There are different types of tool organizers depending on your space and tools:
🔹 Wall-Mounted Organizer – Perfect for small spaces and keeps tools visible.
🔹 Pegboard System – Flexible and allows you to rearrange hooks and holders.
🔹 Drawer Organizer – Keeps smaller tools and accessories neatly sorted.
🔹 Rolling Tool Cart – Ideal for a mobile workspace.
🔹 Shelf-Based Storage – Great for storing larger tools like drills and saws.
🪵 Step 2: Gather Materials & Tools
🔩 Materials:
✅ Plywood or MDF Board – For the organizer base.
✅ Pegboard (Optional) – For hanging tools.
✅ Wood Screws & Nails – For assembly.
✅ Wood Glue – Adds extra strength.
✅ Hooks, Brackets, or Small Containers – To hold different tools.
✅ Sandpaper or Sander – For smooth edges.
✅ Paint or Stain (Optional) – For a finished look.
🔧 Tools:
🔹 Saw – Circular saw or jigsaw to cut wood.
🔹 Drill & Screws – For assembling and attaching hooks.
🔹 Measuring Tape & Pencil – For accurate cuts.
🔹 Clamps – To hold pieces in place while assembling.
🛠️ Step 3: Build Your DIY Tool Organizer
Option 1: Wall-Mounted Organizer
1️⃣ Cut a plywood board to the desired size (2×4 feet is a good starting point).
2️⃣ Attach hooks, brackets, or small shelves to hold different tools.
3️⃣ Secure the board to a wall stud using screws for stability.
4️⃣ Label sections for easy tool identification.
💡 Tip: Add a small magnetic strip for holding screwdrivers and drill bits!
Option 2: Pegboard System
1️⃣ Cut a pegboard to the desired size.
2️⃣ Secure it to the wall using screws and wall anchors.
3️⃣ Insert hooks and pegs to hold tools.
4️⃣ Arrange tools by category (e.g., wrenches on one side, hammers on another).
💡 Tip: Use zip ties to hold bulkier tools securely!
Option 3: Drawer Organizer for Small Tools
1️⃣ Measure and cut thin plywood pieces to fit inside a drawer.
2️⃣ Create compartments for screwdrivers, pliers, and smaller items.
3️⃣ Glue or nail dividers in place.
4️⃣ Sand and finish for smooth edges.
💡 Tip: Use foam inserts to hold tools securely in place!
Option 4: Rolling Tool Cart
1️⃣ Build a simple wooden cart with two or three shelves.
2️⃣ Attach caster wheels for easy movement.
3️⃣ Add small hooks on the sides for extra storage.
4️⃣ Label shelves for quick tool access.
💡 Tip: Install a power strip on the cart to charge power tools!
📦 Step 4: Customize & Finish Your Organizer
✔ Stain or Paint – Protects the wood and gives it a clean look.
✔ Add Labels – Helps you find tools quickly.
✔ Use Foam or Rubber Liners – Prevents tools from sliding around.
✔ Install a Small LED Light – Helps illuminate your workspace.
🎯 Final Thoughts: A More Organized Workspace
A DIY tool organizer is an easy and practical project that improves efficiency and keeps your tools safe. Whether you choose a wall-mounted, pegboard, drawer, or rolling cart setup, you’ll enjoy a neater and more functional workspace!
💬 Would you build your own tool organizer? Let us know in the comments! 🔨😊


